The Best Fluffy Pancakes recipe you will fall in love with. Full of tips and tricks to help you make the best pancakes.
Looking for the ultimate dessert to impress your guests, celebrate a milestone, or simply treat yourself after a long week? This Cream Cake recipe is the definitive answer. Is there anything that truly beats the comforting, nostalgic scent of vanilla and freshly baked cake wafting through the house? I don’t think so. It is an aroma that instantly signals warmth, welcome, and the promise of something delicious.
This Classic Cream Cake isn’t just a dessert to be eaten; it is a companion for life’s moments. Whether it serves as a centerpiece for joyous celebrations and birthdays, a romantic gesture for an anniversary, or a comforting treat for quiet tea sessions, it evokes fond memories of childhood parties and family gatherings. In a world of complex pastries and modern deconstructed desserts, there is something profoundly satisfying about returning to the basics.
Today, I’m sharing my go-to recipe for the best Classic Cream Cake. I’ve tried dozens of recipes over the years—some were too dry, creating a choking hazard rather than a delight; others were unnecessarily complicated, requiring tools only found in professional kitchens. But this recipe? It is the perfect balance of simplicity and elegance. With a sponge texture as light as a cloud, rich stable cream that holds its shape, and a versatile base that welcomes any decoration, it looks and tastes like it came straight from a luxury European bakery.
Get your pans ready, preheat your oven, and let’s bake some happiness!
Why You Will Love This Cream Cake Recipe
- Accessible Ingredients: No need to hunt for strange or expensive ingredients at specialty stores. Everything required for this Classic Cream Cake is likely already sitting in your kitchen pantry or refrigerator. It transforms humble staples like flour, eggs, and sugar into a masterpiece.
- Guaranteed Success: Baking can often feel like a gamble, but not with this recipe. If you follow the 7 steps precisely, paying attention to the texture cues described, the result is 100% guaranteed. It is “foolproof” enough for beginners but sophisticated enough for seasoned bakers.
- The Perfect Texture: Unlike butter-based cakes which can become firm in the fridge, this oil-based sponge remains incredibly soft and moist even when chilled. This makes it the ideal cake to make ahead of time.
- Customizable: This base is a blank canvas for your creativity. While vanilla is the classic choice, you can easily adapt it. You can check out our Guide to Fruit Pairings to see how to layer it with seasonal fruits like mangoes, peaches, or kiwis.
- Light and Airy: The specific method of whipping eggs creates a structure that is sturdy enough to hold the cream but light enough to melt in your mouth.
The Science Behind the Sponge: Why This Recipe Works
Understanding the “why” behind the baking process is just as important as the “how.”
- Aeration is Key: The primary leavening agent in this cake isn’t just the baking powder; it’s the air trapped in the eggs. By beating the eggs and sugar for a full 5-7 minutes, you are creating a foam structure. The heat of the oven expands these air bubbles, causing the cake to rise beautifully.
- Oil vs. Butter: Many ask why we use oil in a Classic Cream Cake. Butter contains water and milk solids and turns solid at room temperature (and rock hard in the fridge). Vegetable oil remains liquid at all temperatures. Since cream cakes must be refrigerated, an oil-based sponge ensures that every bite is soft and tender directly from the fridge, whereas a butter cake might feel dense or dry until it warms up.
- Room Temperature Ingredients: When eggs are cold, their protein bonds are tight, making it hard to incorporate air. Room temperature eggs have looser protein structures, allowing them to whip up to a greater volume and create a more stable emulsion with the oil and milk.
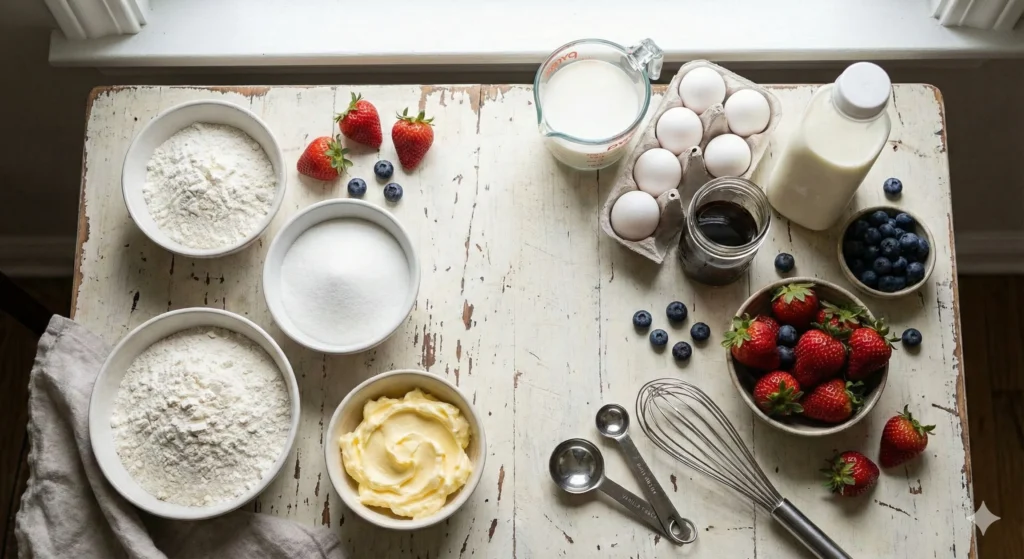
Ingredients for the Perfect Classic Cream Cake
To make a Classic Cream Cake serving 8-10 people, you will need precise measurements. Baking is chemistry, so try to be as accurate as possible.
For the Sponge (The Base of the Classic Cream Cake):
- 4 Large Eggs: (Room temperature – take them out of the fridge 30 minutes before starting).
- 1 ½ cups (Approx. 190g) Sifted Flour: Cake flour is preferred for a finer crumb, but All-Purpose Flour works perfectly fine too.
- 1 cup (200g) Granulated White Sugar: This provides sweetness and helps stabilize the egg foam.
- 1 tsp Liquid Vanilla Extract: Use high-quality extract to eliminate any “eggy” odor and provide a floral aroma.
- 1 tbsp Baking Powder: Ensure it is fresh. This gives the cake that extra lift during baking.
- ¼ cup (60ml) Vegetable Oil: Use a neutral oil like sunflower, canola, or corn oil. Avoid olive oil as its flavor is too strong.
- ¼ cup (60ml) Warm Milk: Warm milk helps to activate the gluten slightly for structure without making the cake tough, and it blends easier with the oil.
- A pinch of Salt: Essential to balance the sweetness and enhance the vanilla flavor.
For the Cream Filling & Frosting:
- 2 cups (480ml) Liquid Whipping Cream: Look for heavy cream with at least 35% fat content. It must be very cold to whip properly.
- ½ cup (60g) Powdered Sugar (Sifted): Using powdered sugar prevents a grainy texture in your frosting.
- 1 tsp Vanilla Extract: Or vanilla bean paste for those lovely black specks.
- For Decoration: Fresh strawberries, blueberries, raspberries, or dark chocolate shavings.
Essential Equipment
- Electric Hand Mixer or Stand Mixer (crucial for whisking eggs).
- Two 20cm (8-inch) Round Cake Pans.
- Mixing Bowls.
- Silicone Spatula (for folding).
- Wire Cooling Rack.
- Parchment Paper.
How to Make a Classic Cream Cake (7 Detailed Steps)
Follow these instructions to master this Classic Cream Cake.
Step 1: Pre-Prep Your Kitchen
Success starts before you mix. Turn on your oven to 180°C (350°F). A properly preheated oven ensures the cake rises immediately upon entering. Grease your two 20cm (8-inch) pans with a little butter and dust them with flour, tapping out the excess. For extra security, line the bottom of the pans with rounds of parchment paper. This guarantees your cakes will slip out effortlessly.
Step 2: Whisking Eggs and Sugar (The Ribbon Stage)
In a large, clean, dry bowl, crack the 4 room-temperature eggs. Add the cup of sugar and the vanilla. Using your electric mixer on high speed, whisk continuously for 5 to 7 minutes.
- What to look for: You are not just mixing; you are transforming. The mixture will change from yellow and runny to pale, creamy, and thick. It should triple in volume. When you lift the beaters, the batter should fall back in a thick ribbon that sits on the surface for a few seconds before sinking. This is known as the “Ribbon Stage.”
Step 3: Adding Liquid Ingredients
Reduce the mixer speed to low. Pour in the ¼ cup of vegetable oil and the ¼ cup of warm milk slowly. Mix for only 10-15 seconds—just enough to blend them in. Overmixing at this stage can deflate the precious air bubbles you created in Step 2.
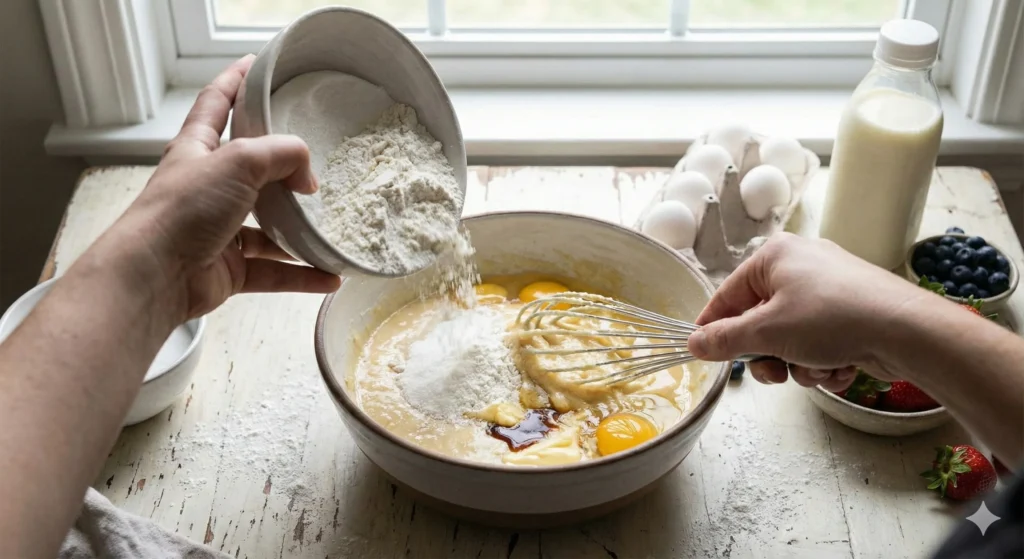
Step 4: Folding the Dry Ingredients (The Art of Folding)
Sift the flour, baking powder, and salt directly over the egg mixture. Sifting is non-negotiable; it removes lumps and aerates the flour.
Stop using the electric mixer immediately!
Switch to a silicone spatula. Employ the ‘cut and fold’ technique:
- Cut down through the center of the batter with the spatula.
- Scrape along the bottom of the bowl.
- Gently bring the mixture up and over the top.
- Rotate the bowl slightly and repeat.
Continue this circular motion gently just until the white flour streaks disappear. Be careful not to over-mix, or the gluten will overdevelop, resulting in a dense, rubbery cake.
Step 5: Baking the Sponge Layers
Divide the batter evenly between the two prepared pans. You can use a kitchen scale to be exact. Tap the pans gently on the counter once to release any large, uneven air bubbles.
Place on the middle rack of the oven and bake for 25-30 minutes.
- Golden Tip: Do not open the oven door before the 20-minute mark. The sudden drop in temperature can cause the rising cake to collapse in the center. Test for doneness by inserting a wooden skewer into the center; if it comes out clean or with just a few dry crumbs, it’s ready.
Step 6: Cooling and Whipping
Remove the cakes from the oven. Let them cool in the pans for about 10 minutes (the cake structure settles during this time). Then, run a knife around the edges and flip them onto a wire rack to cool completely.
Warning: Never frost a warm cake. The cream will melt into a soup.
While the cake cools, prepare the frosting. Place the cold heavy cream, sifted powdered sugar, and vanilla in a chilled bowl. Whip on medium-high speed until you get stiff peaks—meaning when you lift the beater, the cream stands up straight without drooping. Do not over-whip, or you will accidentally make butter!
Step 7: Assembling Your Classic Cream Cake
- Leveling: If your cakes have domed tops, slice a thin layer off the top to make them flat.
- Layering: Place the first cake layer on your serving platter. Spread a generous, thick layer of whipped cream. This is a great place to add sliced strawberries or a layer of fruit jam.
- Stacking: Place the second cake layer upside down (flat bottom facing up) on top of the cream. This gives you a perfectly flat top for decorating.
- Frosting: Cover the top and sides of the cake with the remaining cream. Use an offset spatula or the back of a spoon to create swirls.
- Decorating: Top with fresh berries, edible flowers, or chocolate shavings.
Troubleshooting Guide: Common Baking Mistakes
Even the best bakers encounter issues. Here is how to fix or prevent them for your Classic Cream Cake:
- Problem: The cake sank in the middle.
- Cause: You likely opened the oven door too early, or the cake was underbaked.
- Solution: Trust the timing and use the oven light to check instead of opening the door.
- Problem: The cake is dense and heavy.
- Cause: Overmixing the batter after adding the flour, or not whipping the eggs long enough.
- Solution: Be gentle during the folding step. Treat the batter like a delicate cloud.
- Problem: The cream is runny.
- Cause: The cream wasn’t cold enough, or the kitchen is too hot.
- Solution: Chill the bowl and beaters in the freezer for 15 minutes before whipping. Ensure you are using high-fat whipping cream (35%+).
- Problem: The cake is dry.
- Cause: Overbaking.
- Solution: Check the cake 5 minutes before the recipe says it should be done. Every oven is different.
Flavor Variations to Try
Once you master this Classic Cream Cake, try these twists:
- Lemon Berry: Add 1 tablespoon of lemon zest to the sugar before whipping. Layer with fresh raspberries.
- Coffee Cream: Dissolve 1 teaspoon of instant coffee in the vanilla extract for the cream filling to make a latte-inspired dessert.
- Chocolate Chip: Fold in ½ cup of mini chocolate chips into the batter right before baking.
Storage and Shelf Life
- Refrigeration: Because of the fresh cream, this cake must be stored in the refrigerator. It keeps well for up to 3-4 days.
- Covering: Use a cake dome or cover the cut edges with plastic wrap to prevent the sponge from absorbing fridge odors or drying out.
- Freezing: You can freeze the baked sponge layers (without cream) for up to month. Wrap them tightly in cling film. Thaw at room temperature before frosting.
Nutritional Value (Approx. per serving)
- Calories: 350 kcal
- Fat: 18g
- Carbs: 42g
- Protein: 6g

Conclusion
This Classic Cream Cake is more than just a recipe; it’s a gesture of love. Whether you are baking it for a birthday, a holiday, or just a Tuesday night, the effort you put into whisking and folding translates into pure joy for anyone who takes a bite. It is simple, elegant, and the taste is unforgettable.If you enjoyed this recipe, you might also like our Ultimate Chocolate Fudge Cake or our No-Bake Cheesecake Guide. Try it today, snap a photo, and tag us